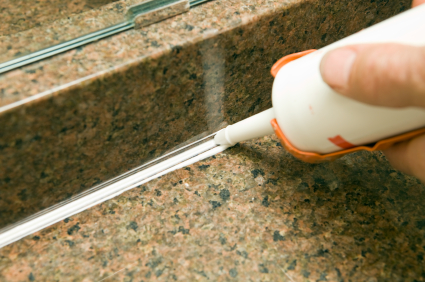
Ever been frustrated by what should be the simple job of caulking? We’ve all seen those How-To articles that show caulk being applied like there is nothing to it, but we all know that getting a smooth, consistent finished caulk job that is not amateurish looking can be difficult. If you would like to try caulk repair on your own see the following instructions.
These next steps will teach you how to do your own caulk and silicone repair:
- Make sure to use Silicone caulk. My preference due to both economy and professional results is to use a caulk cartridge and a caulking gun. It is also the most clean and efficient.
- Removing the old caulk and preparing the surfaces is very important for an effective caulk repair. The next few steps detail how to prep the surfaces.
- Remove the old caulk with a handy tool called a retractable razor blade scraper.
- Use the razor scraper to get all the old stuck-on caulk off both surfaces such as the tile and tub. Scrape it clean.
- Vacuum up the debris and vacuum the open joint.
- Once both surfaces are clean and dry, proceed to the next step.
- This is the secret to a professional looking caulk job – any amateur home repair enthusiast can do it! Without this step you will end up with very wide caulk joints once you try to smooth the joint out after application. The use of tape to mask both edges of the joint allows you to set the width of the joint and protect the surrounding finish material from the caulk.
- Take blue painters tape and mask off both surfaces at the point where you want the edge of the caulk to stop.
- Make sure the tape is straight and use long sections of tape, not short pieces.
- The joint will look best if you tape a thinner joint, approximately 1/4″ in total width.
- Press down firmly the edge of the tape that is along the caulk joint.
- Once the joint is cleaned out and masked, you’re ready to caulk.
- Open the caulk tube by cutting the tip at a 45 degree angle and puncturing the inner seal with a long nail or wire. Many newer caulk guns have built in tip snippers and puncture wires.
- Apply the caulk at a 45 degree angle between horizontal and perpendicular.
- Make sure to squeeze hard enough to get the caulk fully into the joint.
- Work at a speed that is slow and consistent. The smoother you make the joint to start with, the easier the job will be.
Once the caulk is applied, the next step is to smooth the joint. Here’s where the tape masking technique will make your job successful. Typically at this point, where tape masking is not used, the caulk would smear and spread onto both surfaces as you pressed the joint smooth with your finger. However, by using the tape masking technique in this tutorial, your caulk joint will be left with only a clean, sharp edge:
- Wet your finger with de-natured alcohol (for silicone caulk). Also dampen part of a rag with water or alcohol as appropriate.
- The alcohol or water will serve as a lubricant and cutting agent as you smooth the joint.
- Using firm pressure, smooth the caulk joint working from one end to the other.
- As your finger becomes laden with excess caulk, wipe it off with the dampened rag and re-wet your finger.
- Continue the smoothing process until the entire taped section you’re working on is finished.
Once the caulk joint has been smoothed out with your finger you’re almost done:
- Once the caulk joint is smoothed out, immediately remove the blue painters tape used to mask the joint.
- Remove the tape away slowly and pull it away from the joint at an angle, not toward the joint.
Now you should have terrific professional looking seems.
If you would prefer to have a professional do the caulking for you, we can help. Contact us today to discuss your project. We start our silicone or caulk replacements at $89.00. We will also inspect your bath or shower area for water damage and other damage commonly caused by time of taking showers over and over and give a free estimate at that time as well.
Bath Renewal proudly serves all of Northeast Wisconsin. Counties in our service area include: Brown, Door, Kewaunee, Manitowoc, Oconto, Marinette, Shawano, Outagamie, Calumet, Winnebago, and Waupaca.
We look forward to serving your bathroom remodeling needs! Call us at 920-569-6825 or Contact Us today.

 Menu
Menu

